
I found some great duck fabric at Hobby Lobby and I knew I had to make something with it!

Dana over at MADE gave me the greatest idea. And thanks to her wonderful tutorial on the Basic Pocket Tote, I made my own tote bag too! And it was SO easy!
Here's how I did it with 1/2 yard of fabric.

I started out with two pieces of fabric about 19 x 19
(you can make yours any size! Dana suggests 17.5 x 14).

For the pocket I cut 7 x 9 inches and pressed down the sides (about 1/4 of an inch).

I got this handy tool at for pressing seams. Beats getting the iron out for a little project like this.

I stitched all the way around the pocket.

I had to add a little tag just like Dana.
My mom had these iron on tags from my childhood and I added it to a piece of ribbon.

I positioned my pocket on the inside of one of the tote panels and sewed it into place.

I measured 4" down and pinned the pocket in place.

Then I measured (with my iphone on hand) for the pocket sizes. I made them about 3" wide.
And then sew your two panels together (no picture for this step)

Fold down the top panels 1/4 of an inch and iron (or use the handy-dandy seam presser)
and then fold down again about 1" pin and sew into place.

Cut two strap pieces 27" each, pin into place along the bottom stitch and sew into place.

Sew and "x" and then I top-stitched all around the top edge of the tote.

I wanted a "bottom" to the tote and used another store-bought bag as an example. This part sounds tricky but it's really not. I pulled out the seam, on each side of the bag, about 4"
(or in your case, mark off 4" from the bottom of the bag and just don't stitch!)
Flatten the bottom seam so you have 2" on either side and pin into place.

You can see here that I've tucked some of the bag (this will be the bottom) and pinned.

Where you see my pins is where I sewed up the sides, again.

I added a little fray check along the edges of my straps. Let it dry and you're done!

I added a couple of my rolled flowers for a little extra punch. I sewed them onto to ensure durability.

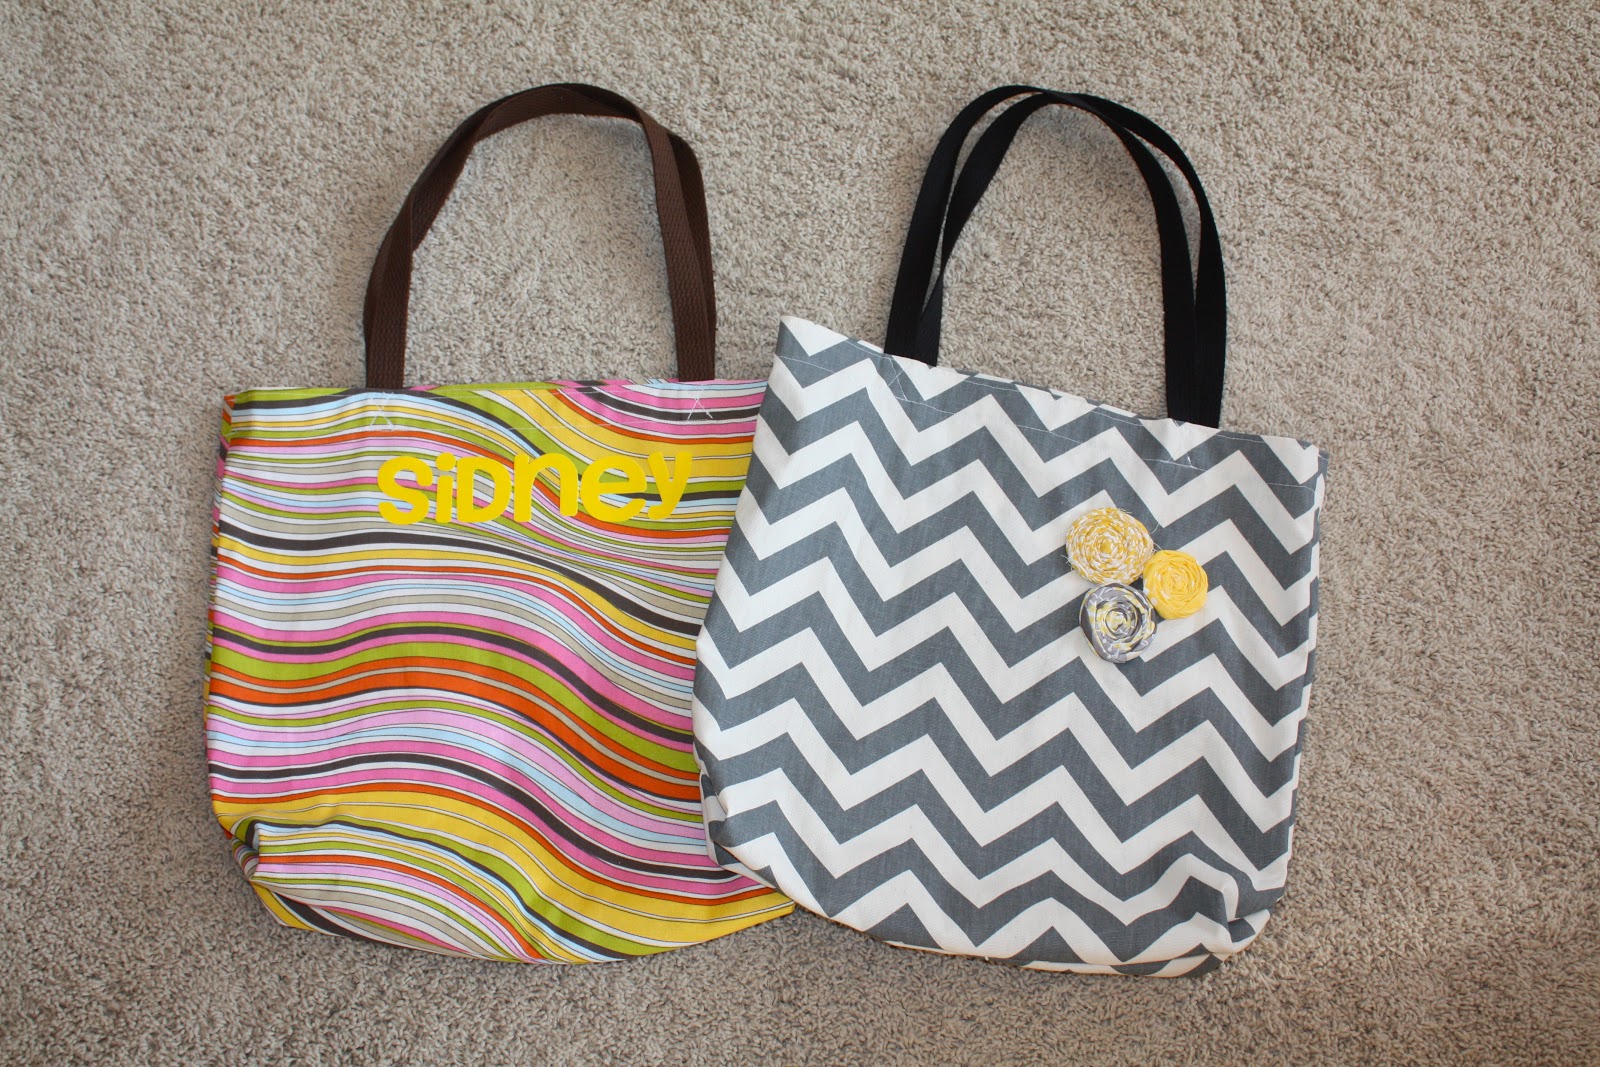
Sidney requested we put her name on hers.
I used iron-on fuzzy flocked vinyl cut out with my Silhouette.

Thanks Dana for your great tutorial! I love my new tote and I'm using it a ton!


Oh my goodness! These are too cute. I'd love to try this.
ReplyDeletesuper cute, Chessa!!
ReplyDeleteGreat tutorial! Those are so cute! I love the gray chevron with the yellow fabric flowers. I'm totally crushin' on that color combo lately. Would love for you to link up to the Pomp Party!
ReplyDeletehttp://jill-createcraftlove.blogspot.com/2012/05/pomp-party-18.html
Jill @ Create.Craft.Love.
Thanks so much for linking these up to my Summer Bucket List, they will be great for pool bags!
ReplyDeleteSo darling!! Hope you can link this up at my brand new Trendy Tuesday party going on right now!! http://www.sweetlittlegals.com/2012/05/trendy-tuesday-1.html
ReplyDeleteSo cute! Do you do commission work?? =) Love the gray/yellow combo as well! TFS!
ReplyDeleteLove it! This looks so great.
ReplyDeletehttp://iheartpears.blogspot.com
These turned out really well. I am a neighbor of yours(Charleston, SC), sorta close, LOL. My family and I were just there at Lake Norman for a Soccer tourney a few weeks ago!!
ReplyDeleteI ran across your comment on Dana's tutorial for the bag and thought I'd pop over and say hi. I made 3 of these bags and they were fun to make.
Happy Fall to you and your family.
http://thesunflowermama.blogspot.com/
How did you hide the stitches from the pocket on the outside of tote? I'm a newbie.
ReplyDelete