Friday, September 30, 2011

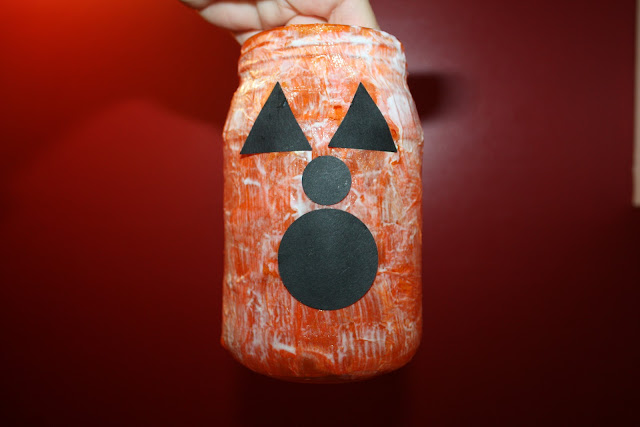
Tissue Paper Pumpkin Jars

We had some of the kids friends spend the night last week. 
I knew I had come up with something to keep the chaos under control. 
So I gathered up some supplies I already had at the house.

  • Orange tissue paper cut into 1 1/2" squares
  • Mod Podge
  • Foam brushes
  • Black card stock
  • Clean empty jars (wine bottles, Ball jars, really anything glass!)
I started by painting on a generous amount of the Mod Podge all over a quarter of the container.
A layer over tissue paper squares goes all over the glued areas. It's okay if they overlap.
After we completely cover the whole container we went over the whole thing with another layer of Mod Podge. DO NOT PAINT, but DAB DAB DAB. Otherwise you will rip the tissue paper.
 I pulled out some of my punches for the face of the pumpkin. 
You could also just hand cut out your own designs.
 We placed our cut out face pieces directly on top of the wet layer of Mod Podge.
Here's how they looked all lit up (we used a glow bracelet for the wine bottle! Tyler's idea.)
The kids making the same face their pumpkin jars have.

Friday, September 23, 2011

Fall Subway Art

It's Fall y'all! 
I was inspired to create another Subway Art for the season.
 It was also time to change things up at bit at my house. 
Pull out the burlap, gather some sticks, empty out some wine bottles 
(I didn't really do any of the emptying!).
 Nothing says Fall to me more than some sunflowers and 
 Glitter pumpkins! Yes, glitter.
 I was inspired by Jen at Tatertots & Jello to get happy with some spray glitter. 
Go here to see how it's done.
I'd love to share my Fall Subway Art with you.
To download your own go here (it's FREE!)
I have mine printed at Costco in a 16x20 print. 
(Remember two things when printing large prints at Costco. You will have to crop the print a bit-I've allowed room for you to do that. And Right before you place the order, unclick the Auto Correct)
If you'd like to see some of my other Subway Art creations, go here.

Tuesday, September 20, 2011

SUMMER 2011

As fall rolls in I realize that I haven't posted the movie I made of our summer activities. 
Prepare yourself, it's a long one!


Friday, September 16, 2011

Fall Burlap Wreath

It's Fall and it's time for Burlap-yeah!
Here's How I did it gathering the following supplies:
  • glue gun
  • 12" wreath form
  • scissors or rotary cutter
  • 1/2 yard natural color burlap
  • 1/4 yard orange & brown burlap
  • staple gun (or the hot glue gun will work too!)
I started out my three different colors of burlap.

 
I cut the natural piece of burlap in half and stapled it all around the wreath gathering it along the way (you can also use your hot glue gun instead of stapling it). 
I didn't start taking pictures up until this point. But really there isn't anyway you could go wrong.
For the burlap rosettes cut one long strip of burlap, about 2" wide.
Fold the burlap in half like this:
Tie a knot at the end.
And then start wrapping the burlap strip around the knot, gluing it as you go around.
I also twisted the burlap strip so I'd get a more frayed look.
When you get to the end, tuck the little last piece on the back and then glue it.
I cut another little square of the burlap
And then glued it to the back of the rosette.
Glue the rosette to the wreath.

Enjoy your new Fall Burlap Wreath!

Monday, September 12, 2011

Fall Portraits

Over the weekend I took the kids to a beautiful old rustic mansion for their fall portraits. 
I decided a while ago that I'm just not crazy about school pictures-
 I don't like the idea of having to order them before ever previewing them! 
So here's my attempt to capture them at age 11 1/2, almost 10 and 7 1/2.


I had some fun editing and playing with the looks of the pictures.


I told Tyler I'd pay him $1.00 if he let his sister's kiss him.
Sometimes I'm not sure who these big kids are. 
It feels like just yesterday I was changing diapers, filling up sippy cups and holding out for nap time!

Friday, September 9, 2011

The Great Pantry Makeover

 I decided it was time for a makeover on the pantry...
I guess I've got too much time on my hands.

Here's the BEFORE. 
 AFTER:
This double door pantry has been great, but really it had become a hiding spot for... everything! 
The white baskets were a nice idea... until things ended up like this 
(note the bread can not be contained. What?!):
 The only way to get this job done right was to clear the whole thing out.
 The dining room table became a holding pen for all the goods. 
My kids were lovin' this idea,
 until I made them taste-test things to find out what we needed to pitch (ie. stale cereal!)
 I started by gathering some jars and containers. 
And then put the "containers" back in the pantry to create some order. 
Now to figured out what was going where.
 I got happy with my Silhouette and laminator.


I tried to use things I already had, like the white bins. Here's where I got some of the other things:
Of course I had to add some "cutesy" element. So I crafted up these letters to spell E A T:
 More on how I did that in another post.
I kept the OATS in the original container and just took off the label and added my own!
 I printed off basic cooking instructions for the Jasmine Rice and Bisquick...
 and adhered it to the back of the canisters.
 If you've never tried supreme pancakes with Biquick-you must. 
They are so light and fluffy!
I can't promise the pantry will stay looking this nice. 
After all I've got some snack-snatchers who are constantly in here!

Simple Spring Wreath

If you've got 7 minutes and a couple bucks, you too can make this Simple Spring Wreath! You'll just need a couple supplies fr...