Friday, April 19, 2013

Duct Tape Purse

Don't you just love all the fun patterns and colorful colors of Duct Tape you can get these days? 
My youngest has been crazy about creating with Duct Tape. 
So we thought it was very fitting to make Duct Tape purses at her birthday party.
I made this sample purse for Katelyn's birthday party and I'll show you how I did it!
I'd been stocking up on fun and colorful Duct tape... 
So I grabbed a couple that I thought coordinated well together.
And a piece of fabric cut that I cut 13 x 8. 
You can choose to cut your fabric any size depending 
on how large or small you want your final product to be.
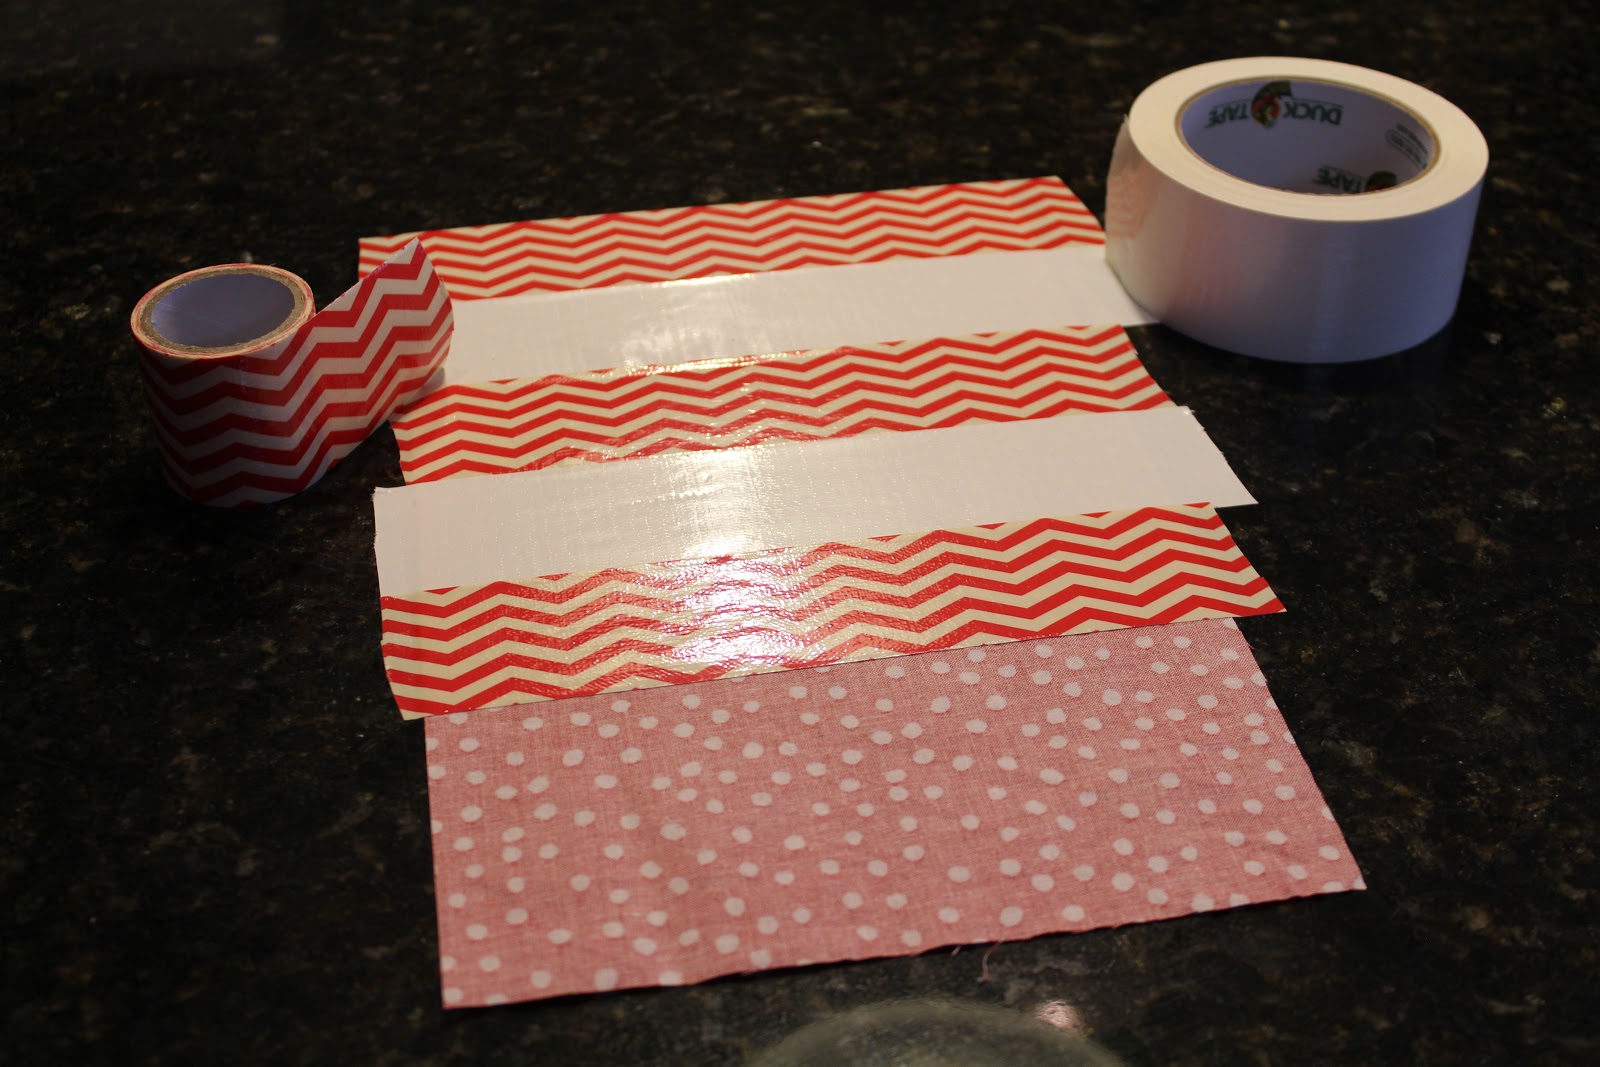
Flip the fabric over so the wrong side is up and starting lining strips of Duct tape from top to bottom onto the fabric, alternating in different patterned tape (or 3 or 4 patterns).
This will become the outside of your purse.
Fold your fabric/duct tape piece in half and attach a strip of tape on both sides.
Use the picture above as your guide. You will need to trim a little of the tape off on the top and bottom.
Here's another look of the side of the purse with the tape attached and trimmed.

The next part may sound a little tricky, but it's not. 
Hang with me here... 
Take your bottom corner and tuck it in gently so 
it's on the inside of the purse and helps to create a base.
This picture may be a little hard to see... 
but way down at the bottom you can see that the corner of the purse has come through.
You'll want to add a strip of tape along the inside seams. Adhering it to the fabric.
I cut a strip of tape in half, but you could use a whole piece.
Next I added a piece of tape all along the top edge of the purse, all the way around. 
It's starting to come together!
For the strap I took a super long piece of Duct tape and folded it in thirds. 
I measured this based on how low I wanted the purse to hang down. 
Be patient and remember this tape is very sticky!
I adhered the strap on the inside of the purse with another small piece of the Duct tape.
I made the strap long enough so the purse could be hung across your chest.
There you have it! 
An adorable hand made Duct tape purse!
It would be very easy to add a pocket to the inside as well. 
Here are some more examples of the girls came up with at the Katelyn's Birthday party.
I'd love to see your Duct tape creations!

Friday, April 12, 2013

Mustache Birthday Party

Katelyn has fallen in love with the latest Mustache Craze. 
So we decided to have her 9th birthday party around that theme.
I sewed this little mustache onto a t-shirt from Old Navy. 
I made myself a t-shirt too! Using the freezer paper technique. Check out the DIY here. 
Here's a little taste of the party, my Instagram collage. 
I found these adorable tin buckets at Target way back in the fall. 
The pink fuzzy mustaches were with the Valentine's party favors.
We made chocolate mustache suckers and tied them up with ribbon from Hobby Lobby. 
We filled the tin buckets with the chocolate suckers, hand sanitizer, tiny mustache earrings 
(found on Amazon for $1.30!) and a couple a mustache stickers.
I cut out black card stock mustaches with my Silhouette and then punched a hole in the middle and stuck the straw through. For the DIY on the bottle, check out my post here.
I had fun collecting black, white and pink accessories from around the house to decorate the mantle. 
The Subway Art is by Eighteen25, you can find it here (free printable!)
 I had so much fun making this banner with scrapbook paper, 
my silhouette and black & white bakers twine.
The possibilities for a banner like this are just endless!
Our craft was to create purses out of Duct Tape (another new favorite of Katelyn's!) 
It was nice to have my almost-13-year-old and her friend helping with the litte-r girls.
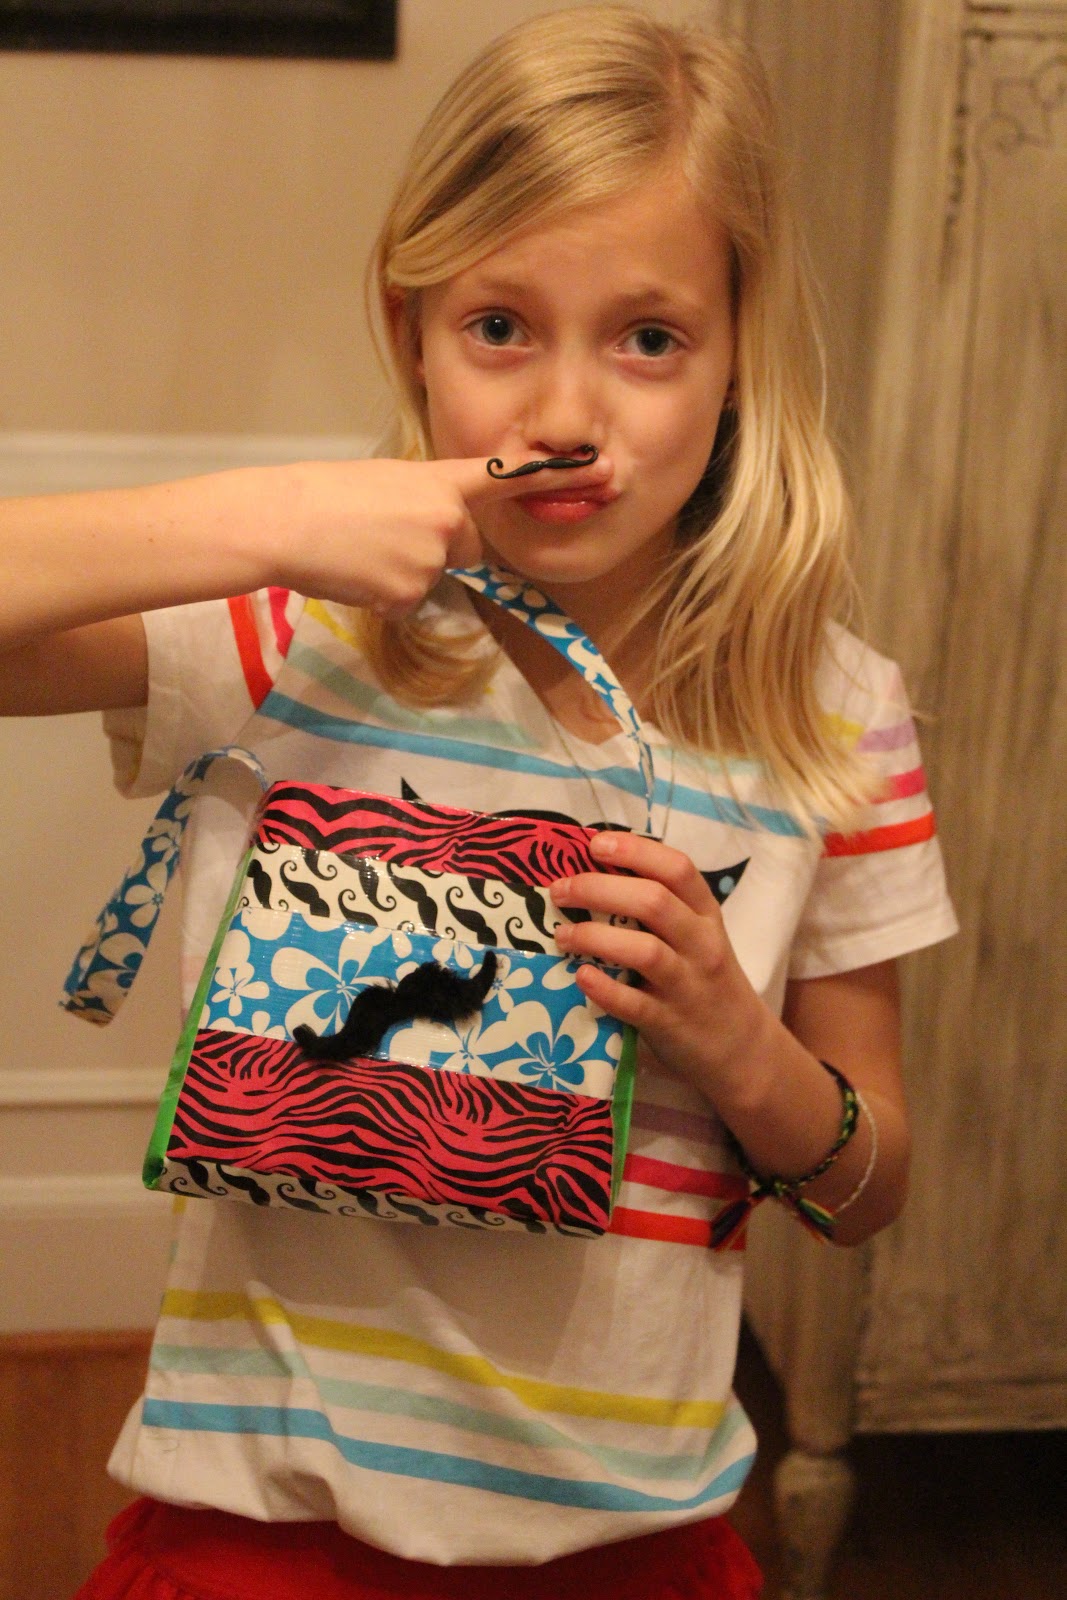
Here is one of the completed Duct Tape purses. 
I'll post the DIY next week (so you have to come back!)
And the Birthday girl and her new purse (and finger Mustache!)
This cake was so fun and so easy! Here's what I did:
1) Bake one cake in a round pan 
(one box actually made two round cakes, so I had two mustache cakes!)
2) Cut the cake like the above picture (I kept thinking about a ying and yang symbol)
3) Frost! And you don't want it to be smooth... I've never seen a smooth mustache.
I have a little trick I use when frosting. 
First I put a little frosting on the plate so the cake doesn't want to slide around. 
I also keep a glass of hot water for dipping my knife into.
Happy 9th Birthday to my Sweet Katelyn!
We all got in on the Mustache action. Ben cracks me up!

Friday, March 29, 2013

DIY Pallet Wood Planter Box

Several months ago a friend gave me a pallet. 
My husband rolled his eyes while I hauled it out of the truck. 
And it's been sitting under our deck ever since. Until now!
I was inspired by Laura at Make it Lovely to make this Planter Box. You can see her tutorial here. 
And I'll let you in on how I made my adorable planter box. 
My turned out quite small because I ended up using 
the pieces of wood off my pallet in between the nails.
And they turned out to be a little smaller than I had planned. 
If you don't have a pallet, you can get some wood cut or use what you have.
So I started out with this worn out old pallet...
 Grabbed my saw (You can use any kind of saw. 
I got this for my birthday a couple years ago and it's great for working with pallets!)
 I sawed off all the wood on both sides of the nails.
I knew I didn't need all of it for this project, but as long as I was cutting...
 And I ended up with a pretty good amount too! 
Most of it will have to be cut again because the edges are even, 
but getting it off the pallet is half the battle.
 Here's the stack I ended up with. Can you imagine what I could create with this... Stay tuned!
 I pulled out the circular saw and a pencil 
and cut each end of three pieces of wood so everything lined up evenly.
 For the planter box you'll need three pieces of wood the same size and two end pieces the same size. As you can see in the picture above.
 Here's an idea of how I planned to put the whole thing together.
 I bought a couple packages of L brackets from 
Lowes/Home Depot and used the drill to put the planter box together.
Here's a view after I put all the L brackets on.
And the underside (iphone pics). You'll notice I did not put a screw in one of the L bracket holes because it would end up being in the middle of the joint and that wouldn't help at all!
 After a light painting and some sanding my planter box is ready for some spring!
How adorable is that?!
 My plan all along was for this to be a little rustic. So no worries that the joints don't meet up exactly. 
Happy Spring! And more importantly, Happy Easter. He has Risen!

Thursday, March 21, 2013

Simples Moss covered Balls

Spring is here (at least it is in my neck of the woods!) 
I needed a couple additions to my spring mantle. 
And I just love moss and moss covered balls. 
What I didn't like was the price!
So of course I decided to make my own!
I started out with these supplies:
  • wiffle balls (found this pack at Target)
  • glue gun and lots of extra glue sticks
  • a sheet of moss (found mine at Hobby Lobby)
  • green thread to match the moss
 I cut a huge square out from the moss sheet, about 1/4 of it.
 I started putting hot glue on a small part of the plastic wiffle ball and wrapped the moss around it. 
I continued adding glue and wrapping the moss around the ball until I had covered the whole thing. 
It's a good idea to keep a scissors handy, 
you will need to cut off some of the moss as you wrap it around the ball.
 You may end up with some "holes" but that it easy to fix. By using some scraps, 
I added hot glue where the ball can be seen or where you can see a seam. 
It's easy to press the moss into each other making it naturally mold together.
 When I was finished covering the whole ball with the moss, 
I wrapped some green thread around the whole thing. 
Tucking the beginning part of the thread and the end of the thread under a small piece of scrap moss.
 My new simple moss covered balls are a great addition to the tin containers on my mantle.
All three of these moss balls took me less than 30 minutes, total.
 I created this Easter Subway art a couple years ago,
there are a couple different colors to choose from and I'd love to share it with you...
Head on over to my post here to download my Easter Subway art.

Simple Spring Wreath

If you've got 7 minutes and a couple bucks, you too can make this Simple Spring Wreath! You'll just need a couple supplies fr...