As promised,
I'm going to show you how I transfer a design to a chalkboard.
I painted this wood slice (found at HL) with chalkboard paint.
To season the chalkboard, I rubbed the side of a piece of chalk all over the board.
Once the whole board is seasoned...
Use a damp cloth to wipe off all the chalk. Don't use a paper towel, it leaves leftovers behind!
The first time around I had to clean off the board twice.
You don't want to get it too wet. But you don't want to use a dry cloth either.
Next take your design and that same piece of chalk.
Turn over to the backside and rub chalk all over,
focusing on the areas that you want to transfer to the chalkboard.
Turn it back over, right side up. You may want to tape your paper in place too.
The next step is to trace the image.
The chalk on the backside of the paper will transfer to your chalkboard.
I like to use a red pen so I can see where I've traced.
As you can see you get a nice outline of everything you've traced, right there on your chalkboard!
This takes a little bit of time. But I love how everything comes out so crisp and clean!
This is the best tip ever! You can sharpen your chalk!!! Check out that nice sharp tip on the chalk!
Now I take my nice sharp chalk and trace over the outline of all the letters.
I love how clean the lines are!
Now that I've got everything outlined. It's time to fill in the letters.
You don't necessarily need a sharp time for this next step because you're just filling in the letters.
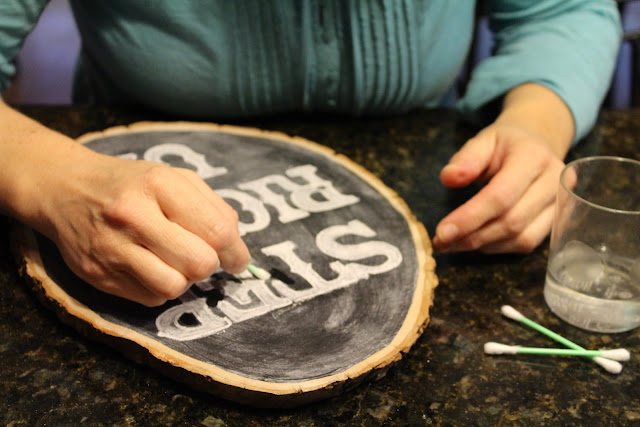
I use my finger to rub some of the chalk inside the letters (this is another one of my favorite tricks!)
Gotta love my husband and my daughter the photog's who stood by documenting every step of this tutorial. Here I am blowing off some of the extra chalk dust.
I also used a wet q-tip or corner of a towel to clean up some of the chalk dust in between all the letters.
I use the tip of my finger too! This gets to be quite a lengthy step for me.
Correcting and making it look just so!
Pretty simple!
I grabbed this little plastic box (actually for a sandwich!) at the Dollar Store.
I've got everything I need here (minus the towel-which wouldn't fit in here and needs to be washed occasionally) "chalk" sharpener, colored chalk and white chalk, q-tips and makeup sponge.
This is my best project to date! I created a document with my
Silhouette Software and Photoshop and then emailed the image to my local Office Depot.
They printed it out BIG (mine is 22 x 30 or something, you can get it any size you want!) and because it was black and white (I added the colored chalk when I was filing in the letters)
it cost me less than $3.00!


gorgeous!!
ReplyDeleteThank you!
DeleteLove it! Thanks for sharing!
ReplyDeleteThanks!
DeleteWhat a great tutorial! Thanks for all the good tips!
ReplyDeleteThank you so much! I'm working on a board for a baby shower and I think this will work WONDERFULLY! So thankful for the smart crafters that don't mind sharing!
ReplyDeleteI'm having so much fun creating new boards! Glad you found the tutorial helpful!
DeleteThis. is. awesome! I love the look of the wood slice! And sharpening chalk....brilliant! I am definitely going to be "borrowing" your idea. :)
ReplyDeleteThis is beautiful, your tutorial and the end result. I love chalkboards, but yours is so unique, I have to try to transfer the letters, did you use graphite paper?
ReplyDeletethanks
martha
I did not use graphite paper. Just regular ole' copy paper from my home printer.
Delete