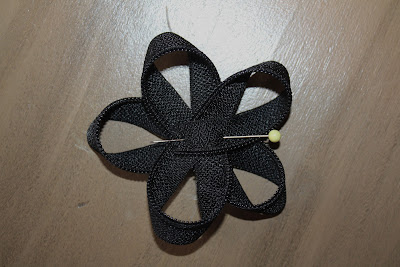
On a recent shopping trip to my local outlet mall, I saw an elastic belt that I would have loved to own... but instead I decided that I would make it. It would be the perfect opportunity to try and craft up some flowers made from zippers. Yes, zippers!
Here's how I did it:
Start with any color zipper.
18" is good.
Cut off the ends.
Then you'll have two strips.
Start by looping one of the zippers like this:
And then like this:
Keep working it. There really is no wrong way to do this.
With your hot glue gun, adhere all adjoining loops.
Until you end up with something like this:
I wrapped another strip of the zipper into a tight circle,
gluing every time I wrapped it around.
And then I added a little button to the center for this look:
You can try buttons, rhinestones or beads in the center.
Without the button it looks great too. Just a different look:
I added pins to the back of each of my flowers.
That way they are versatile and I can use them for more than just my belt.
Measure your waist and add 4" for the overlap.
You'll need 3" black elastic and snap tape (shown below).
Add two strips of snap tape on both ends of your belt.
Pin the snap tape in place and try on your belt before you do any sewing.
You want to make sure you have the right fit for you!
Here's my belt all put together.
I added a silk flower I made.
( I had made a couple for the girls' polka-dot circle skirts back in the fall)
Imagine this with different colored flowers, sizes and shapes.
Stay tuned. I have some more zipper flowers I want to show you.
I've had special requests from my girls.
Check out these blogs for some great zipper flower tutorials:
Great ideas for where to pin your zipper flowers
For all kinds of tutorials on making flowers check out:


No comments:
Post a Comment