Showing posts with label painting. Show all posts

Monday, August 17, 2015

Stamped Tea Towels

I'm in love with these vintage looking stamped tea towels. 
I might just make them for all my friends and family!
I had bought a pack of these simple IKEA dish towels a long time ago 
with good intentions to do something fun.
While browsing through Pinterest, which I do often
I found something that inspired me to finally get to work with these towels.
I grabbed these supplies; foam brush, fabric paint, foam stamps and cardboard (empty cereal box).
 I love this new fabric paint I found at Hobby Lobby.
I chose the Navy Marine color.
I laid out my stamps in my desired position on my tea towel...
I added paint to the foam letter stamp...
With the cardboard behind my towel I stamped all the letters on in place.
I just love the outcome and it really took me very little time to complete all four towels.
The possiblities are endless in terms of the themes and words you use. 
Think of holidays, family names, favorite dishes etc.

Friday, June 19, 2015

Patriotic Painted Ball Jars

Do you need something to sprice up your table for the 4th of July? 
These Patriotic Painted Ball Jars are the perfect thing!
I started out with three Ball Jars and painted one blue and two white. Two coats each.
I taped off sections, to create stripes and painted two more coats of red on the white jars 
and random white stars on the blue jars. 
After about 24 hours when the paint was good and dry, I sanded the jars lightly to remove some of the paint and reveal that classic Ball Jar. I love this vintage feel!
To seal the jars and prevent the paint from chipping off, 
I sprayed a light coat of this Rust-Oleum clear laquer.
I love how versitale these jars can here I played the up with some  
festive Amercian things I already own.
This would be a great project for kids to help you with too!
And something you will enjoy for years to come.
You don't have to wait for the 4th to pull them out, the red and white stripe is cute just on it's own!
Think Memorial Day, Labor Day or what about opening ceremonies for the Olympics!
Happy Birthday America!

Thursday, February 20, 2014

Stacked Wood Frames with Burlap Bow

A couple of things you might already know about me.
 I love painting wood. 
I love burlap. 
And I love photography. 
I combined my love of these three things and came up with this:
A stacked wood picture frame with a large burlap bow!
I gathered the following supplies. 
Two frames, a foam paint brush, paint, wood glue and burlap ribbon (all from Hobby Lobby).
The frames were fairly cheap, and even better when I got them on sale 40% off!
After I painted both frames and lightly distressed them around the edges.
 I added wood glue to the small frame and glued it to the larger frame.
I just love this great big loose burlap ribbon. 
It's so easy to make a nice big bow and hot glue it to the top of my new stacked wood frame.
 I think I might make a dozen of these for various locations around my house. 
And maybe a few for some friends!
**note** 
Wood frames do not include glass. 
However you can find a piece of glass from another frame (Dollar Store) or have one cut.


Wednesday, January 22, 2014

Personalized Painted Mug

Baby, It's cold outside! Even in North Carolina. 
I got the girls together, along with a couple of their friends 
and we crafted up some new personalized mugs!
 We used the following supplies; Oil-based Sharpie's (I got mine at Hobby Lobby). 
It's very important that you use oil-based paint markers (like these Sharpie's) 
otherwise it may come off when you run it through the dishwasher.
 White ceramic mugs. I found these at Wal-Mart. 
Use of an oven in a well ventilated space.
 I cut jumbo plump letters with my Silhouette. But you can use a scrapbooking sticker too. 
 Apply the sticker to the center of the mug, burnishing the edges. I made sure that I placed the letter so that it would be facing out when I was drinking. You may not prefer to do it this way though.
 I started with the silver pen and placed dots all around (and a little over) my letter.
 Making sure not to go too fast, or you will end up with little lines and not dots!
 After I added the right amount of silver. I added red. And then added a little more silver and then a little more red. Until I was happy with the shape and the amount of dots.
 How cute is that! I think it may even make the hot chocolate taste better!
 We used a different color combination for each person in our family.
 Before you go ahead and boil your water for your own hot chocolate, 
you'll want to bake the mugs in an oven for 30 minutes at 350 degrees. 
This will help the paint to "bake" onto the mug and resist wearing in the dishwasher.
I left them in the warm oven (turned off) for a couple of hours as well.
These would make great gifts, party favors or a craft for a birthday party!
Enjoy and stay warm!

Friday, June 7, 2013

Transformed Tray from IKEA

You've got to see how easy it is to transform a plain ole' tray from IKEA into this:
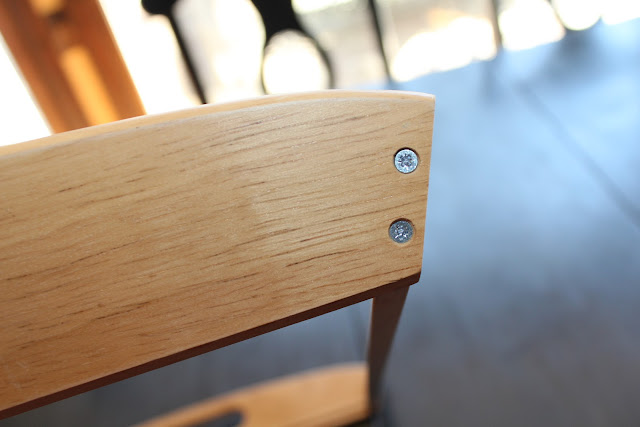
I love the shape of this tray from IKEA. Not so crazy about the light colored wood.
I started out with the following supplies:
  • 1/4 yard vinyl fabric from Hobby Lobby
  • Spray Adhesive
  • Sandpaper
  • Valspar's paint and primer in one spray paint

 I am in love with this spray paint by Valspar from Lowes. 
The coverage is amazing and the satin finish is perfect!
 I started out by taking out the two screws on one side of the tray.
With the bottom out I went to work scuffing up the wood with my sandpaper. 
With a damp cloth I wiped up the outside of the tray 
and then spray painted the whole thing a coupe times and drying in between coats.
Apparently I did not take pictures of the next couple steps. But here's what I did. Cut the vinyl fabric large enough to fit the base of the tray and wrap around the edges. 
With the middle part of the tray separated from the outside I used my sandpaper to scuff up the glossy white center. Wiped it down clean and then applied the spray adhesive. 
I carefully placed my cut fabric on the center part of the tray and wrapped it around the edges.
After the newly painted outside of the tray was dry
I added the center and attached the 2 screws securing it all back together.
Done!
In addition to the great new color and style, the wipes up clean!
Now who's gonna bring me breakfast in bed!

Friday, February 22, 2013

Easy DIY Art

My daughter pin's lots of things that she wants me to make. This was one of them.
We love this phrase, part of the verse from Psalm 46:10 "Be still and know that I am God."
We started out with only few supplies. Canvas, chipboard stickers, 
paint in various ombre shades and a foam paint brush.
With a ruler and pencil in hand I drew some lines so I could space my letters out evenly.
This part was easy because the letters already had sticky backs. 
I just placed them on the lines, justified on the right side on the canvas.
And then the fun part-painting! I started with the darkest color and worked my up the canvas. 
 Sometimes I blended some of the colors together. 
 When I got to the top I added a lot of white to the blue.
There really isn't a wrong way to do this. And the possibilities are endless!
This hangs in my daughter's room. But it really would be a great addition anywhere.

Simple Spring Wreath

If you've got 7 minutes and a couple bucks, you too can make this Simple Spring Wreath! You'll just need a couple supplies fr...