Monday, March 28, 2011

Easter Subway Art


I love all the Subway Art I keep seeing on various blogs. 
I decided I'd try my hand at creating my own.  
Something similar for a much more important holiday….
E A S T E R
I created this to remember the single act of atonement Jesus made for us.
Now here's something worth putting in a frame.
 The colors brown, yellow & robin's egg blue are perfect in my family room. 
You too can have Easter Subway Art to display in your home!
 I created three versions to choose from.
If you like the one I have in my house you can download it here.

Or if you like this spring-y version better, download it here.
 And I had to make one with "jelly-bean colors". Get it here.
Each Subway Art print was designed for printing a 16 x20 print.
I had mine done it at Costco, and for only $5.99! 
If you decide to print it at Costco, remember to check the box "do not autocorrect."
Happy Easter!

For an inspirational Easter message check out one of my favorite author's, Max Lucado
maxlucado.com/email

Wednesday, March 23, 2011

Decorating with MOSS

Welcome Spring! 
We've had some beautiful weather the past couple of days.
So naturally it was time to change the look on the front door.
I'd been looking around for a new idea and here is the result:
I started out with a simple wood letter I found at JoAnn's
  And a package of Instant Green 16 x 18 sheet of Moss. 
A hot glue gun in hand...
....the creating began! I loved working with this moss, it was so easy!
Here's how I did it:
 Lay the moss face down and with the letter on top, face down.
 Add hot glue so it sticks to the face of the letter.
Cut about 1/2 inch all the way around the letter.  
And cut at an angle on the corners.
Like this:
 Wrap the moss all the way around the letter.
Hot gluing along the way.
 Add some hardware to top for hanging. 
These are nice because they screw in and I was able to do it by hand without predrilling any holes.
Depending on your letter, you may need only hanger.
 I added a little bird as an accent.
Use a little piece of moss to cover to stick. 
 I used twine like this:
Ribbon would look cute too.
 I added a bow and tied it a little off-set.
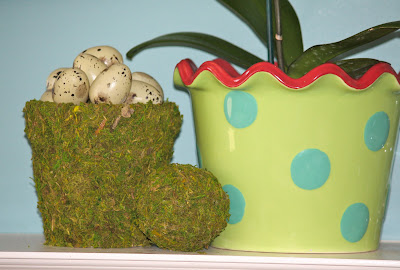
 I had some leftover moss...
 ... and a vase that I just wasn't ever using.
So I hot glued various pieces all over the vase. 
And it turned out great!
I was having so much fun with the moss.
I searched through a bin of balls in the garage and covered one of them!
And then another vase, until I ran out of moss. 
Time to make a trip to JoAnn's!
Until next time...

Wednesday, March 16, 2011

Zipper Flower Headbands

As promised... here are some more zipper flower creations. 
 Both my daughters requested headbands with zipper flowers.
They immediately put them on when I finished making them.
 I cut out a small circle from some felt. 
Hot glued the flower to the felt and then to the headband. 
I cut out a little square and glued the headband in between the felt pieces.
I covered the whole headband with two long zippers-so the teeth are on both sides.
Katelyn wasn't interested in being photographed today...

Wednesday, March 9, 2011

Elastic Belt with Zipper Flowers

On a recent shopping trip to my local outlet mall, I saw an elastic belt that I would have loved to own... but instead I decided that I would make it. It would be the perfect opportunity to try and craft up some flowers made from zippers. Yes, zippers!
Here's how I did it:
Start with any color zipper. 
18" is good. 
Cut off the ends. 
Then you'll have two strips. 
Start by looping one of the zippers like this:
And then like this:
Keep working it. There really is no wrong way to do this.
With your hot glue gun, adhere all adjoining loops.
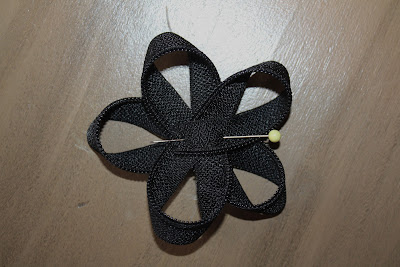
Until you end up with something like this:
I wrapped another strip of the zipper into a tight circle,
gluing every time I wrapped it around. 
And then I added a little button to the center for this look: 
You can try buttons, rhinestones or beads in the center. 
Without the button it looks great too. Just a different look:
I added pins to the back of each of my flowers. 
That way they are versatile and I can use them for more than just my belt.
Measure your waist and add 4" for the overlap. 
You'll need 3" black elastic and snap tape (shown below).
Add two strips of snap tape on both ends of your belt. 
Pin the snap tape in place and try on your belt before you do any sewing. 
You want to make sure you have the right fit for you!
Here's my belt all put together. 
I added a silk flower I made. 
( I had made a couple for the girls' polka-dot circle skirts back in the fall)
Imagine this with different colored flowers, sizes and shapes.
Stay tuned. I have some more zipper flowers I want to show you. 
I've had special requests from my girls.
Check out these blogs for some great zipper flower tutorials:
Great ideas for where to pin your zipper flowers 
For all kinds of tutorials on making flowers check out:

Wednesday, March 2, 2011

Katelyn's Desk & Chicken-Wire Board

My baby turned 7 last week. She has been begging for a desk. So naturally, I had to make her one.
I could not find any building plans for what I had envisioned. I did, however, find the desk I liked at Land of Nod, but I did not like the price. With Ben's help, we figured out all the right dimesions and I set off the buy the wood. I had planned to buy pre-made legs, but after discovering that I had to pay at least $12.00 per leg, I set out to find an old beat-up table or desk for the legs. We found this table for $10.00 at the amazing Habitat for Humanity re-sale store!

So that's less than $2.50 per leg (cause the table top is worth something, right?)
Legs look better on the desk, don't ya' think?!
I had to make a drawer. I won't even go into the details on how I improvised my way through that part. Our little girl loves the finished product, though. She's storing little note books and stickers inside.
The desk and little shelf are actually two separate pieces.
My hardware came from Hobby Lobby. 
I love their selection and wish I had more things that needed new knobs and pulls.
I found the chair at an antique store. And recovered the seat.
I like the distressed look, but there may be a little too much black showing for me.
What do you think?
Chair Before:
Chair After:
To complete the look I made a chicken-wire bulletin-board for over the desk. Here's my picture-tutorial on how I did it:
Make a frame. I used 1 x 3's.
Glue and then screw the two corners of the frame together with brackets.
Putty up the joints. Paint with your desired color.
Purchase 24" x 10" 20-gauge chicken wire.
Cut to size. Folding over any rough edges.
Staple to the edge of the chicken wire to the backside of your frame.
 Cover the rough edges with felt for a finished look and this will help to protect the wall as well.
Add your hanging hardware.
The finished Chicken-Wire board!
I also made little clothes pin clips. With these basic supplies. 
Painted and then added ribbon.
Here's a couple pictures of Katelyn's' first reactions to her new desk.
 So happy that she's so happy.

Simple Spring Wreath

If you've got 7 minutes and a couple bucks, you too can make this Simple Spring Wreath! You'll just need a couple supplies fr...