Thursday, November 11, 2010

FREE and practically FREE

I love to paint things! Furniture mostly. But I've recently discovered spray painting lamps and light fixtures. You can take anything that is blah and make it look "Ah-ha!"

I recently purchased 5 lamps at a thrift store, for $.99 each!
Lamp #1 started out looking like this:
Using Rust-Oleum Universal Metallic spraypaint in the Oil Rubbed Bronze finish 
(I also recommend Rust-Oleum Universal Hammered in Brown
I've used it for the builders grade light fixture over my kitchen table). 

And old lamp shade I found in my basement and some beaded trim, 
turned my lamp into something new and contemporary.
I got a little happy with my new found love for spraypaint. I painted the Brass & Nickel light fixtures in 2 bathrooms with the same Oil Rubbed Bronze finish. And found an old Brass lamp in my basement, (it  looked nice in my traditional living room back in 1997) but it needed an updated look. 
 Complete with a new lamp shade I found on clearance at Target. 
Here is my new floor lamp:
1 can (about $8.00) did 3 light fixtures and 2 lamps. 
Here's a closer look at the paint finish.


Onto Lamp #2
For a pop of color in my living room, I add a little of this:
and end up with this:


And now for the FREE stuff. 
I was out of town for a couple days and my husband picked up some things on the side of the road. Literally, the side of the road. FREE! He knows me too well. These are just two of the four things he brought home. 
I got a little too excited about this first table, I forgot to take a picture of the before. But trust me, it wasn't pretty. It had a couple tiny gold flower pins that were easy to pull off. So I did.
 I love love love this little table.
This tired table needed a face lift from me and some paint found in my basement.
I didn't really like this fan medallion on the front
So  I popped  it off and added a couple new more contemporary ones. 
After sanding and painting it black, here's my finished sofa table:
I think my family room is complete... until I find something else I can "re-do."

Thursday, October 28, 2010

A Lovely Blog Award

onelovelyblog[1].jpg

My sweet sister in-law (In my head I'm singing "sisters, sisters, there were never such devoted sisters") nominated me for the Lovely Blog award. I still feel a little new to this blogging world and SO enjoy meeting new people through it, so thank you Gretch!

The rules, should you choose to accept it: =)
1: Put the one Lovely Blog award logo on your blog
2: in a new post, share 3 things that you think are lovely
3: pass the award on to 3-5 other bloggers
4: link the nominees in your post
5: let the nominees know they have won the award by commenting on their blog
6: share the love and link to the person from whom you received the award


My Lovely Things:
Dessert, preferably something with chocolate
Spending time with my family and friends on the shores of Lake Michigan
Creating...

3 Lovely Blog Nominations:
(It's really hard to choose...but I can only do three)
Reese: My super creative & techy neighbor and friend (this girl has 4+ blogs!!!)
Darby: My favorite place to go and read about real life, enjoy great photography & be inspired 
Eighteen25 Sisters: My new go-t0-girls for fun and creative things to make


Wednesday, October 27, 2010

P U M P K I N

I've gone crazy for Pumpkin!!!

I've been stocking up on canned pumpkin. 
I heard that last year stores ran out, so I've been buying a can every-time I grocery shop.
Last week I made, Pumpkin Muffins (two kinds!), Pumpkin Cheesecake, Pumpkin Flapjacks, Pumpkin Milkshakes, Pumpkin Spice Muffins and Caramel Gingersnap Pumpkin Cheesecake. So thought I'd share my recipes with you!

Pumpkin Cheesecake has become a favorite among my friends. I must make it a half a dozen times each fall. 
 Pumpkin Cheesecake
1 (16oz) packaged pound cake
4 tsp pumpkin pie spice, divided
3 large eggs
2 Tb butter, melted
1 (8oz) package cream cheese, softened
1 (15oz) can pumpkin
1 (14oz) can sweetened condensed milk
1/2 tsp salt

Combine the cake mix, 2 teaspoons pumpkin pie spice, 1 egg, and butter in a large mixing bowl; beat at low speed with an electric mixer until crumbly. Press mixture into a greased 15 x 10-inch jellyroll pan.

Beat softened cream cheese at medium speed until creamy. Add remaining 2 teaspoons pumpkin pie spice, remaining 2 eggs, pumpkin, condensed milk and salt; beat until blender. Pour over cake mix mixture.

Bake at 350 degrees for 30 minutes or until set. Cool completely in a pan on a wire rack. Cover and chill. Cut into squares.

These Pumpkin Chocolate Chip Muffins are Super Simple and SO yummy!
Pumpkin Muffins
1 box of Spice Cake
1 can pumpkin
1/2 cup water
3/4 cup chocolate or cinnamon chips

Mix it all together, fill muffin cups and bake at 350 for 20 minutes. 

Pumpkin Muffins go really well with Pumpkin Milkshakes. The ingredients are simply:
For our milkshakes we used 1/2 cup milk, 1/2 cup pumpkin, 1 cup of ice-cream and a dash of pumpkin pie spice (or just cinnamon & nutmeg if you don't have pumpkin pie spice). 
We added some crushed Oreo to our milkshake, yummy!

Let's not forget about the Pumpkin Flapjacks!
and for this recipe go here.
And then there were the Pumpkin Spice Muffins. I made these for the ladies in my Bible study and individually wrapped them. It was to remind them that our God is sweet to us!  This recipe was from the Pioneer Woman, check out the recipe here. 

And last, but not least I made the most delicious but-impossible-to-get-out-of-the-pan Caramel Gingersnap Pumpkin Cheesecake by the Pioneer Woman (I forgot to take a picture & TPW wouldn't let me copy hers). If you decided to make this, I think I'd leave the caramel out on the crust portion and only add it to the top.The recipe is here.

Happy baking! I'd love to hear about the pumpkin things you like to make.


Sunday, October 24, 2010

I MADE it!

I've discovered and started following some new blogs lately.
MADE has quickly become one of my new favorites.
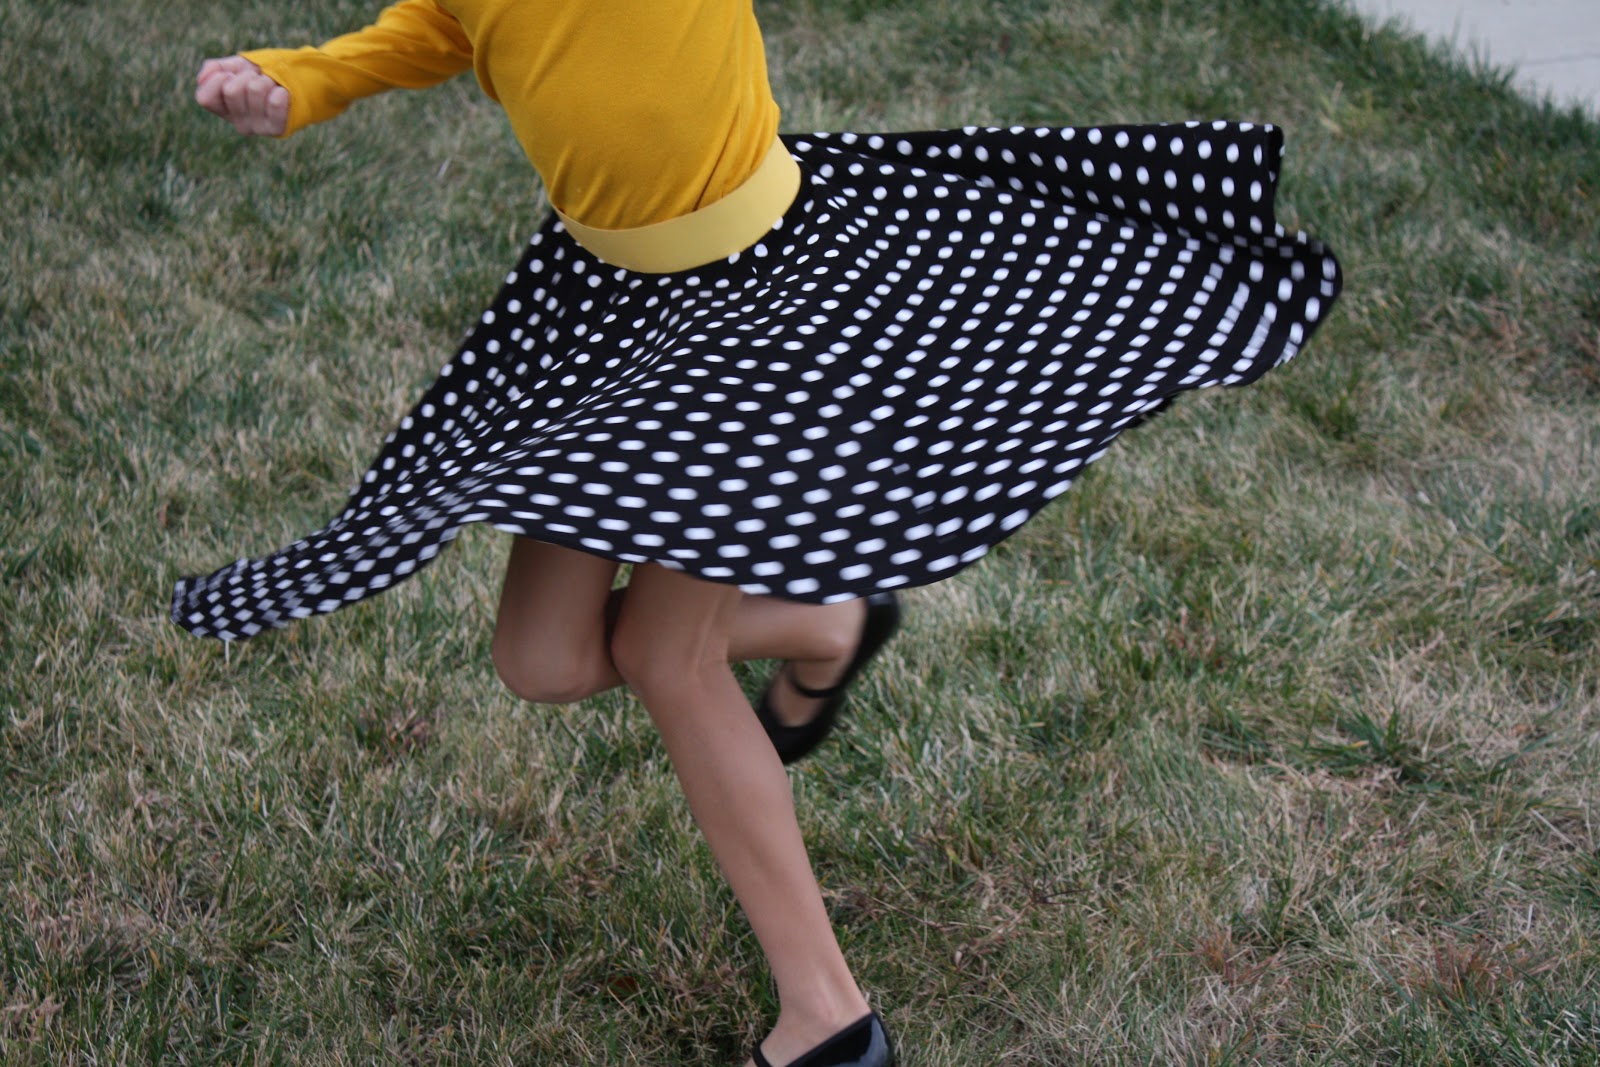
This is where I was first introduced to the Circle Skirt, made out of one big piece of fabric cut into the shape of a circle, with a hole in the middle. So more like a doughnut.
Of course I had to try it!
Go here for the tutorial on the Circle Skirt. 
Blogger Dana suggests dying the wide elastic for a fun contrast, 
so I had to try that too! 
And as long as I'm dying elastic, how about a coordinating shirt too!
Yea, that's a double thumbs up from my Sidney. 
Thanks Sid, it's fun making things for you!
It's fun to twirl in your new circle skirt! 
I made one for myself too and I'll post about that later.
One of biggest trends lately are silk flowers on t-shirts, headbands and pins. I had to try my hand a making a couple. Martha Stewart has a great template for cutting out flowers. Check it out here. 

Happy
Fall
Ya'll!

Saturday, October 9, 2010

Candy Corn

Everyone loves Candy Corn at this time of the year.


So when I buy it, I have to hide it. But I like to decorate with it and put it in a cute jar or vase and tie a festive ribbon around it. 


And then the Candy Corn starts to disappear. 


Oh well... I found a way to make Candy Corn last forever...


I crafted up these adorable Candy Corn earrings & necklace for my girls.


They really take no time to make. And it's a good excuse to get the drill out again (yes, you need a drill for this project!)  I can't take the credit for the idea, I frequently visit Eighteen25 and saw the idea. For all the detailed directions, go here.

Wednesday, October 6, 2010

Nashville

We took a spontaneous trip to Nashville a couple weekends ago. 
I made a little movie of the clips from our trip. Enjoy!

Hey Kids, Look what Mom made while you were at school today!

I saw another great project at Ana White's website and I had to try it.
See the plans here. 


So I found myself a FREE wood pallet (actually pulled it out of a dumpster this time!) And I went to work cutting the boards down to the right size. I had to make slight adjustments because several of the boards were broken and unusable. I used new wood for the sides, and jigged-out some handles.

I also added caster wheels to the bottom per Ana's suggestion.
 I think this would be great for storing shoes, recycling, toys and just about anything else! 


I just had to put another picture in of my cute little model.
Thanks for your help Katelyn!

Simple Spring Wreath

If you've got 7 minutes and a couple bucks, you too can make this Simple Spring Wreath! You'll just need a couple supplies fr...