Thursday, May 31, 2012

Chalk Board Globe

A while back I got "antsi" and decided the globe in Tyler's room needed a face lift.
 So naturally, I painted it. 
This time with chalk board paint! Here's what I did:
I started out with a plain old globe.
 Grabbed some primer spray paint.
 And primed the whole thing. Base and all.
 Found some semi-gloss royal blue (remember that huge paint stash in my basement?!)
 Then I painted all the metal on the globe.
 Paying close attention to getting the whole base painted.
It's okay that I got some of the paint on the globe. I'm going to cover that up next!
 Using one of the cheapy foam brushed I painted on the chalkboard paint.
A there you have it, the Chalk Board Globe!

Thursday, May 24, 2012

5 minute DIY Vest!

Seriously. 5 minutes on this totally cute and easy vest made from a men's t-shirt.
I was inspired by the super creative Anne over at Wobisobi and her 5-minute draped vest
Here's how I did it (and you can too).
I picked up an XL men's black t-shirt and grabbed my sewing scissors.
I cut the sleeves off and cut off the side seams.
 I folded the shirt in half in order to cut evenly around the neck.
 Cut out the neck (I went back again after I took this picture and cut even more off).
When you lay it flat this is what it looks like.
Your arms go through the hole with the shoulder seam at your neck and the other seam at your back.
Here's how it looks from the back 
(I can't believe I'm posting a picture of my backside. 
Good thing it's a little blurry and cropped!)
So simple!
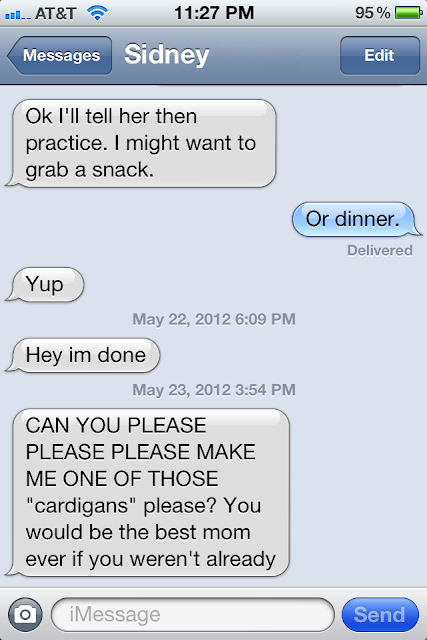
Immediately after I put my new vest on I received this text from Sidney.
And 5-minutes later she had her very own vest!

Friday, May 18, 2012

Easy DIY Tote Bag

I found some great duck fabric at Hobby Lobby and I knew I had to make something with it!
Dana over at MADE gave me the greatest idea. And thanks to her wonderful tutorial on the Basic Pocket Tote, I made my own tote bag too! And it was SO easy!
Here's how I did it with 1/2 yard of fabric.
 I started out with two pieces of fabric about 19 x 19 
(you can make yours any size! Dana suggests 17.5 x 14).
 For the pocket I cut 7 x 9 inches and pressed down the sides (about 1/4 of an inch).
 I got this handy tool at for pressing seams. Beats getting the iron out for a little project like this.
 I stitched all the way around the pocket.
I had to add a little tag just like Dana. 
My mom had these iron on tags from my childhood and I added it to a piece of ribbon.
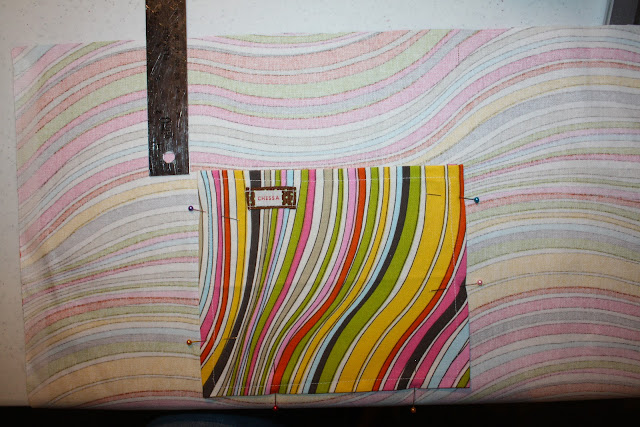
I positioned my pocket on the inside of one of the tote panels and sewed it into place. 
 I measured 4" down and pinned the pocket in place.
Then I measured (with my iphone on hand) for the pocket sizes. I made them about 3" wide.
And then sew your two panels together (no picture for this step)
Fold down the top panels 1/4 of an inch and iron (or use the handy-dandy seam presser) 
and then fold down again about 1" pin and sew into place.
 Cut two strap pieces 27" each, pin into place along the bottom stitch and sew into place.
 Sew and "x" and then I top-stitched all around the top edge of the tote.
 I wanted a "bottom" to the tote and used another store-bought bag as an example. This part sounds tricky but it's really not.  I pulled out the seam, on each side of the bag, about 4"
 (or in your case, mark off 4" from the bottom of the bag and just don't stitch!) 
Flatten the bottom seam so you have 2" on either side and pin into place.
 You can see here that I've tucked some of the bag (this will be the bottom) and pinned. 
 Where you see my pins is where I sewed up the sides, again.
I added a little fray check along the edges of my straps. Let it dry and you're done!
 I added a couple of my rolled flowers for a little extra punch. I sewed them onto to ensure durability.
 Sidney requested we put her name on hers.
 I used iron-on fuzzy flocked vinyl cut out with my Silhouette.
Thanks Dana for your great tutorial! I love my new tote and I'm using it a ton!

Thursday, May 10, 2012

Ready for the Beach

We've had a couple little girls celebrate their birthday's recently 
so I finally had the opportunity to put together this fun "Ready for the Beach" kit.
 I gathered the following supplies:
 Water bottle, bucket & shovel (they usually come together), 
sunscreen, sun glasses and waterproof cards (keep a look out for H20 Uno!)
 I created some tags using my Silhouette program (today it decided to NOT cut them out for me) 
but nothing my good old paper cutter and corner rounder couldn't handle!
the tag reads:
WATER BOTTLE
Let the word quench your thrist
"Taste and see that the Lord is good, blessed is the one who takes refuge in him." Psalm 34:8
 GAMES
All good things come from God
"The Lord your God is with you, He is mighty to save. He will take great delight in you. 
He will quiet you with his love, He will rejoice over you with singing." Zephaniah 2:17
 SUNGLASSES
Look at the world through Christ's eyes
"As a new commandment I give to you that you love one another as I have loved you, and that you love one another as yourselves. By this all men will know that you are my disciples." John 13:34
 SUNSCREEN
"Put on the whole armor of God, 
that you may be able to stand against the willes of the devil." Ephesians 6:11
 BUCKET
Collect the treasures of God's word
"Fear not for I am with you. Do not be afraid for I am your God. 
I will strengthen you and hold you in my right hand of righteousness." Isaiah 41:10
 SAND SHOVEL
Dig into the word of God
"As newborn babes, desire the sincere milk of the Word that you may grow. 
If so you will taste that the Lord is gracious." 1 Peter 2:2
Ready for the beach!

Thursday, May 3, 2012

Easy DIY Washer Necklace & Earrings

I saw this cute washer necklace on Pinterest and I had to take a stab at making one myself.
For the details, head over to Wobisobi, with the DIY on how to for the "Acer."
 I started out with these supplies.
 Chain, bead, two sizes of jump rings, two sizes of washers, head pin, pliers and a clasp.
 My photog was not home, so I restored to one of those pictures in the mirror. 
The earrings are super light weight and go with everything!
And then I grabbed some beads I had and created this!
And some earrings to match!
Super fun. Super Easy! After you make the Acer you can make anything. 
I wore this out to brunch and running errands the other day (jazzy I know!) 
and I got some many compliments!

Simple Spring Wreath

If you've got 7 minutes and a couple bucks, you too can make this Simple Spring Wreath! You'll just need a couple supplies fr...