Friday, May 27, 2011

Ruffle Scarf

I love going to a nice restaurant for dinner. I love eating outside in the summertime. 
And I love the combination of going out to eat and then eating outside. 
But my husband does not... and so sometimes we sit inside the restaurant. 
And the air-condition is blazing. 
And then I am freezing! 
The solution?  
A summer scarf!
 The idea came from Diane at MADE. Check out her great tutorial here.
I found three great light weight fabrics.
 And whipped up these scarfs in no time!
So who wants to go out to dinner?!

Thursday, May 19, 2011

A LOVE for Ruffles

And I'm not talking about the potato chip kind. 
There are Ruffles everywhere and I love them! 
I knew I needed to try them on some pillows. 
Here is the first of many projects I've put Ruffles on!
I started with a couple yards of some white muslin. 
I cut two squares the same size as my pillow form (in this case 24 x 24). 
And then cut 6 strips of 4" wide fabric on the BIAS. 
My mom said if I cut it on the bias then I didn't need to finish the edges. YEAH!
 I sewed a gathering stitch down the middle of each strip. 
And then gathered each evenly.
Next I pinned each strip to one my squares, evenly spacing them out.
 I only pinned the edges at fist, so I could move the strips easily if I needed to.
 Then I added the pins all the way down the ruffles.
 Sew down the middle of each strip, basting down the ruffles 
(Ben says my fingers in this picture scare him. And it looks like I'm 90. Which I am not!)
I sewed on all the ruffles, times two! 
 
This is just the start of the Ruffle craze in Sidney's bedroom! Stay tuned...

Saturday, May 14, 2011

Pinkalicous

It's so fun to make dresses for my girls-especially summer dresses! My latest creation I like to call "Pinkalicous." Don't you just love the yummy colors of the fabric?!
I made the dress with out a pattern. 
My first try at doing anything like this!
This is the dress that inspired me:
The back of the inspiration dress:
The back of my dress has no button or a tie. 
Should I add a tie?
 I'm so proud of myself for matching up the stripes!
 It's such a nice completed look.
 The bottom of the inspiration dress has a cute ruffle.
I found this great pleated grosgrain trim.
It was so easy to add to the bottom of the dress!
If you're interested, here's how I did it:
I bought 2 yards of fabric, folded it in half so the stripes were going vertical 
and then laid my inspiration dress right on top.
 I cut about 1" around the bottom half of the dress (just the skirt).
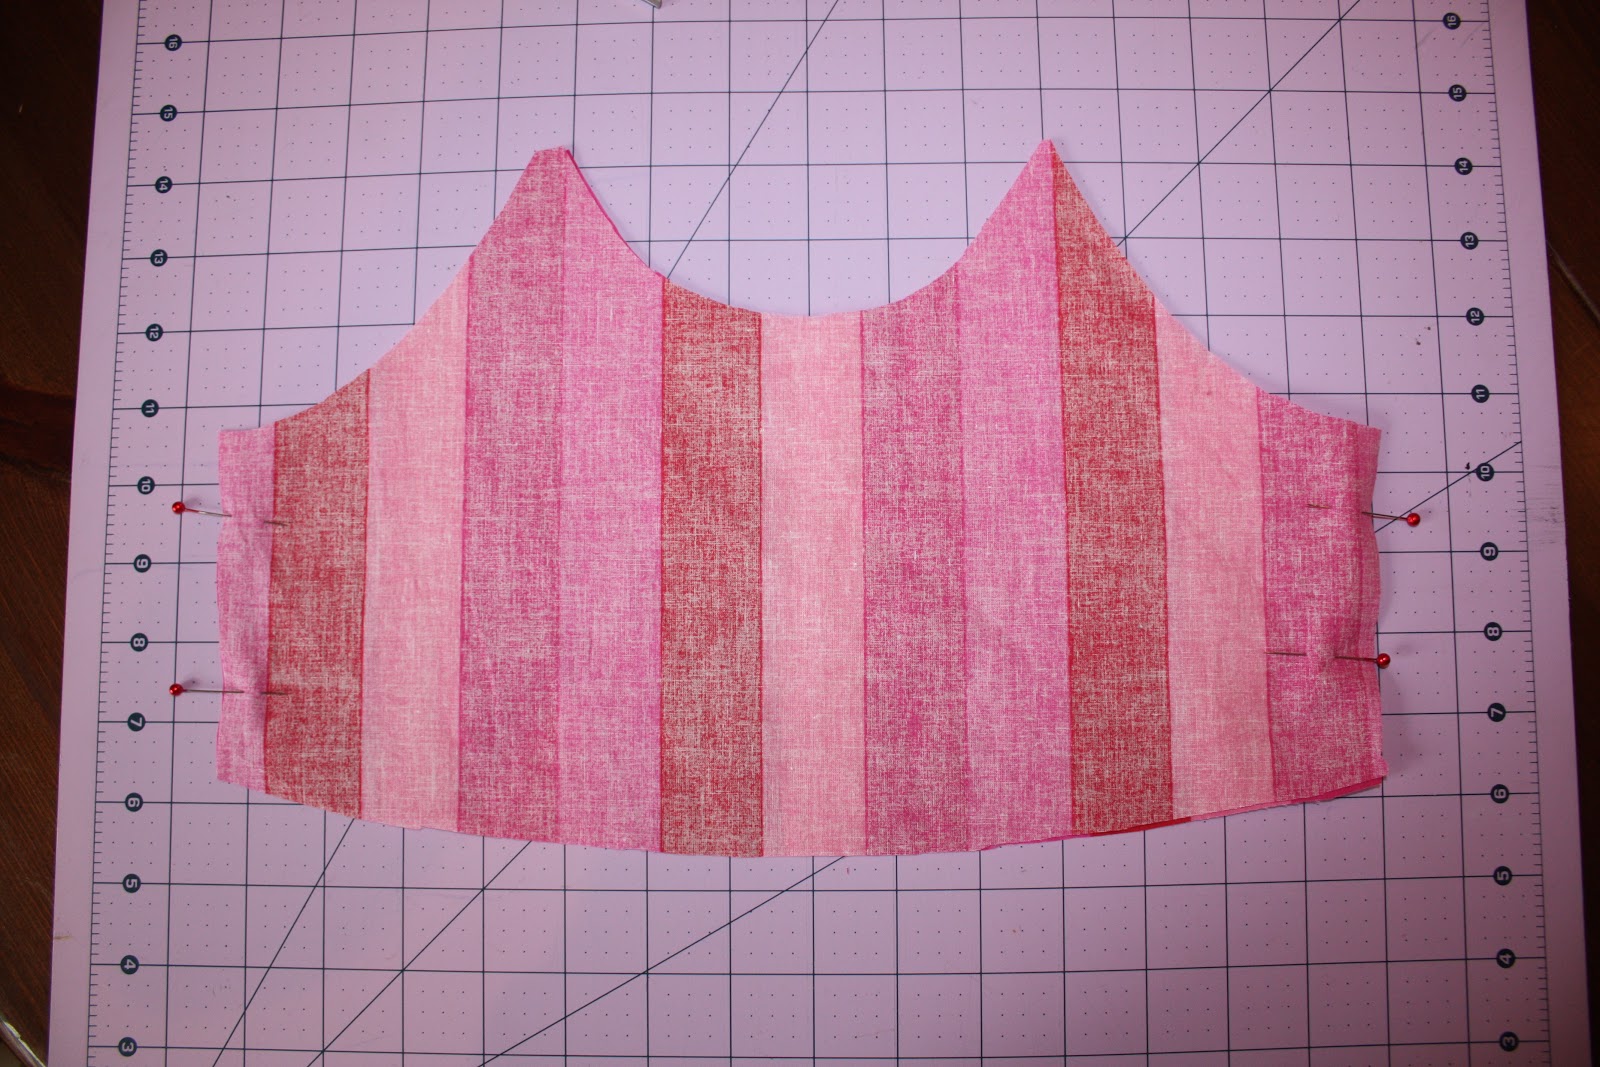
 And then I cut out the top part of the dress (just the bodice). 
 I folded the bodice in half and cut around to make sure I had equal proportions.
Then I pinned the right sides of the bodice together and sewed up the sides.
After pinning the right sides of the skirt together. I sewed up the sides.
The next step is to pin the skirt to the bodice. 
In this case I had to match up the stripe pattern for a seamless look.
I added the grosgrain ruffle to the bottom of the dress
 When sewing the ruffle at the neckline, 
I decided to sew it right down the middle... 
 And cut at the basting line like this:
 And I got this look!
I made my own bias tape sewed around the arm holes and the back of the neckline. 
You can see here how it's also used as the ties.
Here she is, Pinkalicous!


 Are we done yet?

Wednesday, May 4, 2011

Teacher Appreciation Gifts

This week is Teacher Appreciation week at our school. 
I found this great idea from Melissa at the Domesticated Lady
I made my own bag toppers, but you can go here for Melissa's free download.
I also found these cute plastic insulted cups with a straw. 
I added vinyl monogram letters cut out by my Silhouette-
(you could also use stickers and spell out the teachers name). 
 I stuck a couple packets of Crystal Lite inside the cup. 
Quick, easy and OH SO CUTE!
Thanks for stopping by! I'd love to hear from you.

Chalk Board Herb Pots

Last year Tyler and I planted herbs into Chalkboard Painted Pots. I
 thought it would be a great idea for a Mother's Day gift or Teacher Appreciation.
We started with plain tera cotta pots...
Using Valspar's Chalkboard paint we painted only the bottom part of the pot.
 Add potting soil and herb seeds. 
Tyler actually did most of this project himself!
 Use a piece of chalk to write the name of the herb on the pot.
Now don't you wish you could see what they looked like when we were all finished? 
We forgot to take a picture before we gave them all away! But you get the idea.

Monday, May 2, 2011

A Girl's Emergency Clutch

I'm so excited about this project. 
I found the idea at one of my favorite crafty blogs, Eighteen25
You've heard me talk about them before, but this one takes the cake!
Aren't they SO cute!
 They start out as potholder and by adding some snack size zippies, a button and some ribbon...
You have a great little clutch for your wallet or just something to leave in the car.
 For the details on how to make your own go here.
I thought I give them as gifts for Mother's Day and Teacher Appreciation!
A little tag fits nicely in the outside pocket of each clutch.

Simple Spring Wreath

If you've got 7 minutes and a couple bucks, you too can make this Simple Spring Wreath! You'll just need a couple supplies fr...